The first thing to do when setting out to create a regular expression with RegexMagic is to provide sample text on the Samples panel. You should provide samples of text that your regular expression should match, as well as samples of text that your regular expression should not match.
Use the toolbar in the top left corner of the Samples panel to add blank samples, load samples from text files, and paste samples from the clipboard. You can add as many samples to the list as you like. Click on a sample in the list to see and edit its text.
Regular expressions are often applied to short bits of text, such as the text typed into a single line edit control, or a line read from a text file. In situations where your regex will be applied to no more than one line of text at a time, you can set the “subject scope” to “line by line”. RegexMagic then treats each line in your sample text as a separate sample. This way you need to add only one sample to the list on the Samples panel.
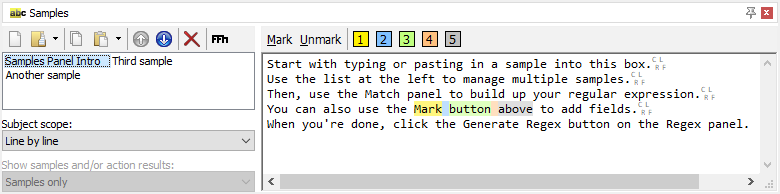
The next step is to mark the parts of the samples that your regular expression should match. The How to Create Regular Expressions topic explains this. The screen shot above shows 5 marked fields.
After you’ve generated your regular expression, you’ll come back to the Samples panel to check which text your regular expression actually matches. As the screens shot below shows, the highlighting changes when you generate the regular expression. It indicates the text actually matched by each field.
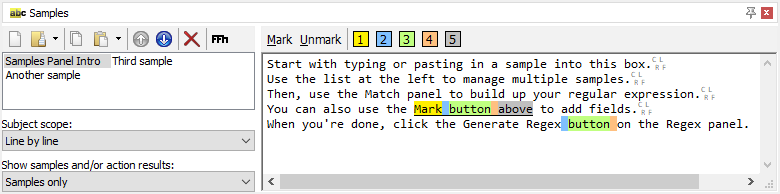
The five fields that were marked are now highlighted with more intense colors. Intense colors indicate that the regular expression actually matched that part of the text, and the color indicates which field actually matched the text. Muted colors as in the screen shot at the top of this page indicate text that you marked as a certain field, but that was not matched by the regular expression at all.